!!! My website has
moved: please update your bookmarks to debunix.net !!!
Bread from Wheat to Eat
This was not the best batch of bread ever, but still illustrates my
bread technique pretty well. I've played around with different
techniques for mixing, kneading, rising, proofing, and baking, and this
is what I do most of the time.
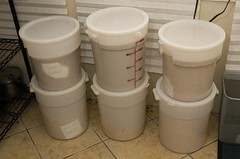
I start with whole wheat berries, which I buy 25 or 50 lbs at a time,
so I have a collection of buckets for storing the several varieties I
usually keep on hand (hard white, soft white, and durum are the usual
suspects, plus whole field corn).
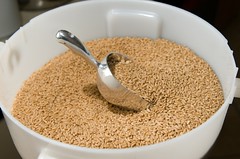
The wheat gets weighed out before milling, here 500 grams is about the limit of what my food processor motor can handle:

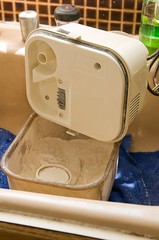
I set up the mill in the sink like this to help contain the dust and
lining the sink with the towel also cuts down on the noise a bit.
I call the mill my baby jet plane, because the milling heads on
this impact mill spin at 28,000 rpm and it is LOUD. I never mill
without earplugs.
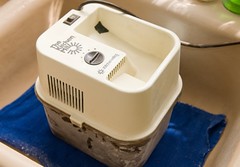

Milling now, adding wheat to keep the hopper full as it blasts away. Note the dust spot on the side of the sink.

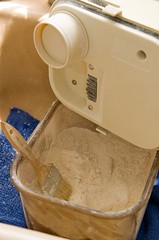
Next, after unplugging the mill, everything stuck on the lid gets
brushed into the bowl. The metal teeth there are the milling
heads. The little cups also get removed because a few teaspoons
of flour gather in there and need to be brushed out. Then the
whole thing gets emptied into whatever is needed for the next
step--here, into a mixing bowl, but it could also go straight into the
food processor.

Now in the food processor, I add about 1 teaspoon of salt and 1
teaspoon of instant yeast directly on top of the flour. I'm using
the regular metal blade, not the 'dough blade' that came with it.

I have some sourdough starter that I'm going to add for a bit of extra
flavor, but because it hasn't been refreshed in a while and is not
strong enough to raise the bread, this 'psuedo-sourdough' will also use a full complement of yeast.
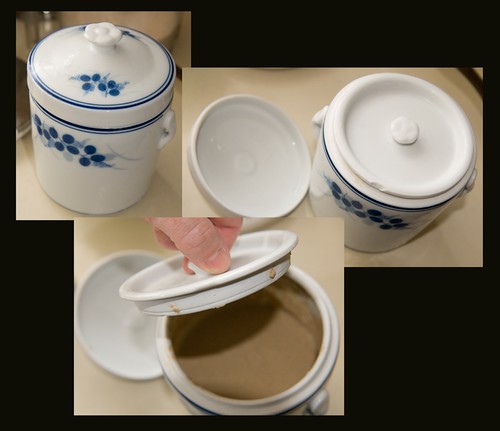
The starter lives in a neat little three-part ceramic crock that seals
tightly enough to keep it from drying out, but loose enough to let
fermentation gases out so it doesn't explode all over the fridge.
I used about 1 cup of starter that is about 1:1 water:flour, and mix it
with the rest of the liquid used for the bread before adding it to the
flour mixture. Here, I'm just using another 1 cup of water, no
honey or oils.
starter

1 cup of starter

1 cup of starter plus 1 cup of water, and a bit
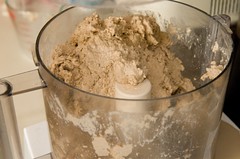
Pour it all straight in, and turn on the processor.

A dough forms pretty quickly--within much less than a minute:
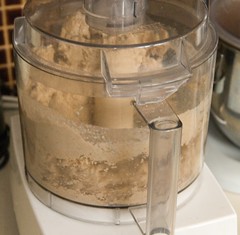
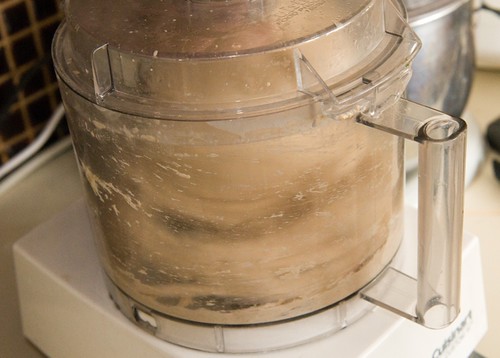
Now I let it sit for the 'autolyse' to hydrate the flour--10-20
minutes--before the kneading. The dough is a bit stiff and dry,
however, and I can tell that it needs more water--because it is rough
and doesn't sag when the motor is stopped. The 2 cups of liquid I
added contained some flour, so my 'about 2 cups' wasn't enough.
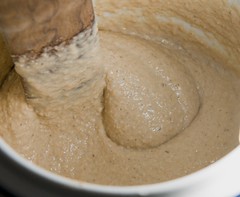
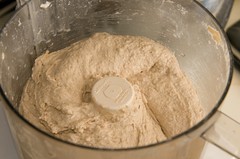
After the 'autolyse', I've turned it back on to knead, and added
another 1/3 cup of water as it worked. After about a minute, the
liquid is absorbed and the dough is 'cleaning the bowl'
This is now a very soft, rather sticky dough, might have overdone the water a bit:
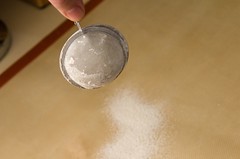
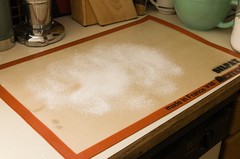
A tea strainer makes a great dredger to dust the work surface (a silpat sheet) with flour, thinly and evenly
And now the dough is dumped onto the work surface, and kneaded a few
strokes to round it, before it gets plopped back to a bowl for rising.
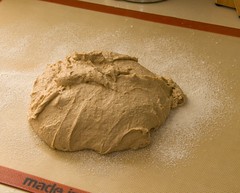
The rounded dough here is a bit saggy:
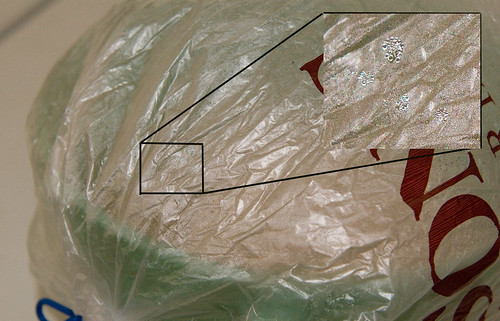
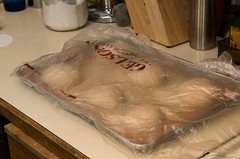
The dough and bowl are put into a plastic produce bag, and if you
handle it right, it's easy to capture abundant air in the bag so it is
puffed up well above the rim of the bowl. This gives the bread
room to rise without touching and sticking to the plastic, and keeps it
nice and moist. The clip is tight enough to keep enough air in
the bag but not so tight as to cause the gases released from the
fermenting dough to pop the bag

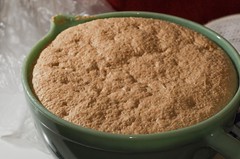
After 45 minutes at room temperature, the bag is already misted on the inside with moisture;
and a few hours later there are a few little trails where water drops have formed and run through the condensation

The dough has gone a little over the top here, starting to sag back
already before I got to it. That's what happens when you're
having too much fun in the garden to stop and tend it; fortunately, the
bread will forgive the neglect. Still, you want to catch it when
it is still domed.
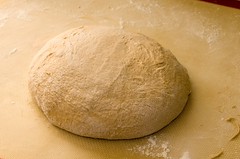
Turned out again onto the silpat, re-rounded with a few turns, and back to the bowl:
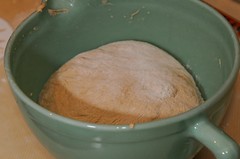
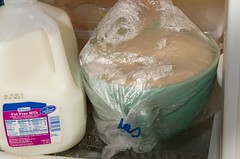
And into the refrigerator for rising overnight:
The next day, the dough is removed from the fridge, and returned to the work surface for dividing and shaping:
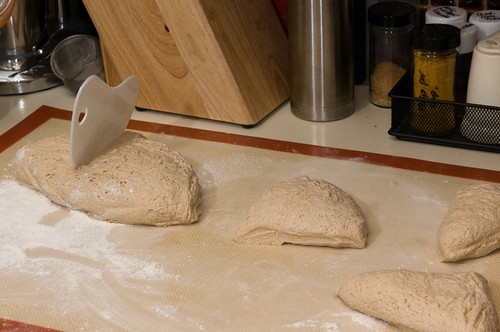
I divided this into six pieces for large rolls or small loaves--enough
for one morning's toast or to eat with a bowl of soup. Single
serving loaves work best for me.
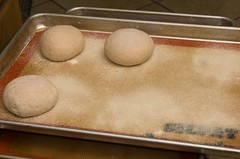
The shaped loaves are set on a silpat-lined baking sheet, sprinkled
with coarse semolina flour, and are put back in the bag for rising--in
this case, I just open up the bag to a single layer of plastic, which
just covers one baking sheet, loosely, and doesn't stick to the dough
because it's already pretty damp on one side:
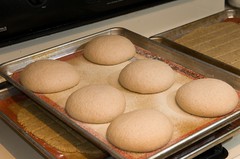
Now they proof for about 45 minutes. The dough has to come to
room temperature, and then rise, so this takes a while. Here
they're about doubled in bulk, and relaxed to a flatter shape.
Meanwhile, I've been preheating the baking bricks in the oven.
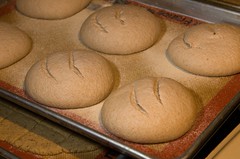
Last stop before the oven is slashing the loaves. I'm still not
very good at making the right kind of deep, angled cuts, which permit
the dough to expand without having to tear the already formed crust.
I used my bread knife because I couldn't find the lame.
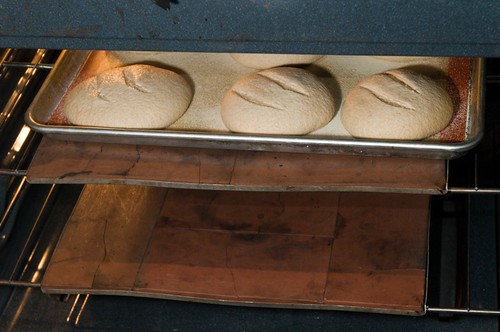
Now into the oven, onto the preheated bricks. If I were really
determined, I could carefully place the formed loaves directly onto the
bricks, with a fresh layer of semolina in between, but here I take the
lazy way out and just put the pans on the bricks. I probably lose
a bit of potential oven spring that way.
This time I tried a new trick for keeping the oven steamy, which
helps keep the crust soft until the dough is fully expanded. I
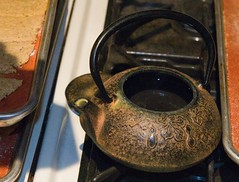
put a small cast-iron teapot full of boiling water directly on the
bottom of the oven, beneath this lower tray of bricks. In theory,
it was supposed to keep bubbling and steaming away....
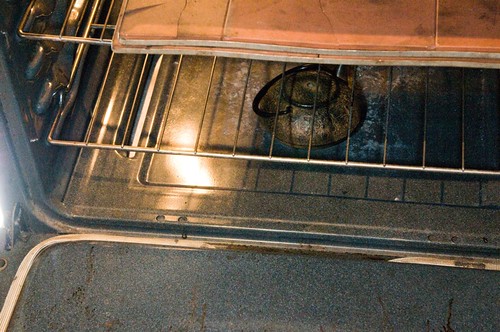
afterwards, though, there was still quite a bit of water in it, which
I'm trying to show here, so I'm not sure how much steam it really made:
I check for doneness not by knocking their bottoms, but checking the
temp. For simple country rolls like this, I want 205-210 degrees
internal temperature
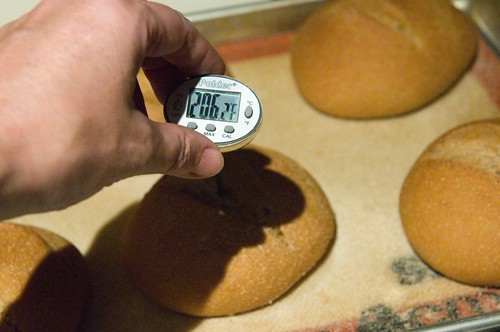
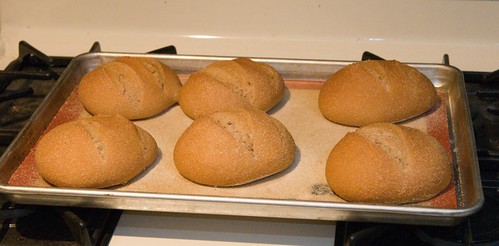
And here are the finished loaves
Transfer to a cooling rack, out of reach of bread-thieving cats or other dangerous creatures, and you're done.
Return
to Recipe Index
Return
to Diane's Food Page
Return to Diane's Home Page